Kodi repositories serve as collections of add-ons. While Kodi comes with its official repository, incorporating third-party repositories expands access to a broader selection of add-ons, thereby enhancing Kodi's capabilities on your Ubuntu system.
Adding a Third-Party Repository
To utilize add-ons from external repositories, you must first add the repository's source to Kodi and subsequently install the repository itself.
Steps to Add a Repository Source:
- Launch Kodi on your Ubuntu machine.
- Navigate to System (this is often represented by a gear icon on the main screen, typically in the top-left corner).
- Select File manager.
- Choose Add source by double-clicking or selecting it.
- In the "Add file source" window that appears, click on <None>.
- You will be prompted to enter the paths or browse for the media locations. Here, you must type the exact URL for the third-party repository you intend to add. This URL is specific to each repository.
- Click OK.
- In the field below labeled "Enter a name for this media source," input a descriptive name for the repository (e.g., "My Custom Repo"). This name will help you identify it later.
- Click OK to save the source.
Steps to Install the Repository from a ZIP File:
- Return to the Kodi home screen.
- Select Add-ons from the main menu on the left side.
- Click on the Add-on browser icon, which usually resembles an open box or package, located in the top-left area of the Add-ons screen.
- Choose Install from zip file.
- If this is your first time installing from an unofficial source, you may see a security warning stating that installing add-ons from unknown sources is disabled. If so, select Settings, enable Unknown sources, and confirm any warning prompts. Then, navigate back and select Install from zip file again.
- Select the name you assigned to the source in the previous set of steps (e.g., "My Custom Repo").
- Browse to locate the repository's ZIP file within that source (the file name often ends in `.zip`, like `*-1.0.*`). Select it.
- Wait for a notification in the top-right corner confirming "Add-on installed" or "Repository installed."
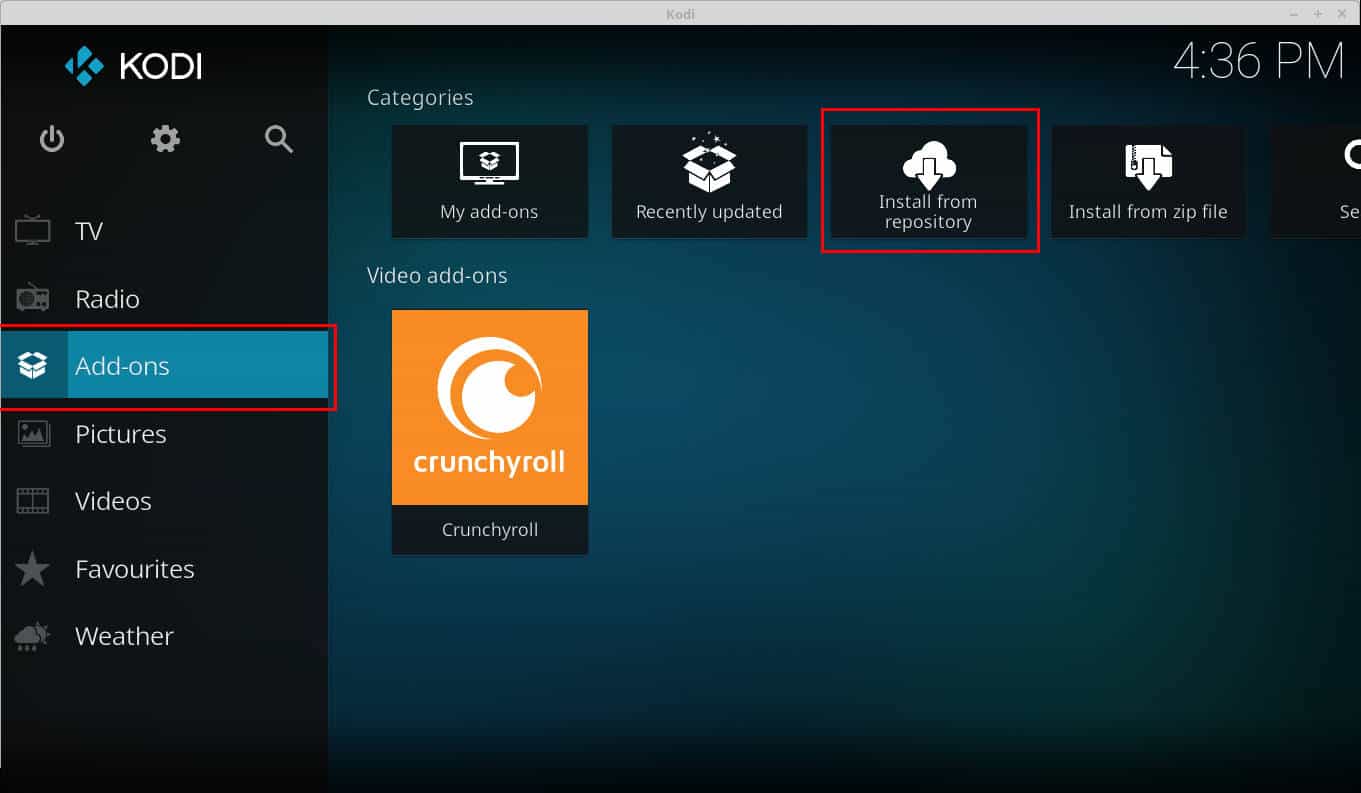
Installing Add-ons from the New Repository
With the repository successfully installed, you can now browse and install the add-ons it contains.
- From the Add-on browser screen (where you selected "Install from zip file"), now choose Install from repository.
- Select the repository you have just installed from the list (e.g., "My Custom Repository").
- You can now browse through the various add-on categories offered by that repository, such as Video add-ons, Music add-ons, Program add-ons, etc.
- Select the specific add-on you wish to install.
- On the add-on's information page, click the Install button.
- Kodi may display a dialog showing any additional dependencies (other add-ons) that will be installed. Confirm by selecting OK.
- Wait for the "Add-on installed" notification. The add-on will then be available from your Add-ons section.
Important Considerations
- Source Trustworthiness: Exercise caution. Not all third-party repositories are safe or legitimate. Only add repositories from sources you trust to avoid malware or security vulnerabilities.
- Legality: Be aware that some third-party add-ons provide access to copyrighted content without proper authorization. Using such add-ons may be illegal in your jurisdiction. It is your responsibility to ensure compliance with local laws.
- Maintenance and Updates: Add-ons from third-party repositories usually update automatically if the repository is actively maintained. However, repositories can become outdated or be discontinued.
- System Stability: Unofficial or poorly coded add-ons can sometimes cause instability, crashes, or conflicts within your Kodi setup.