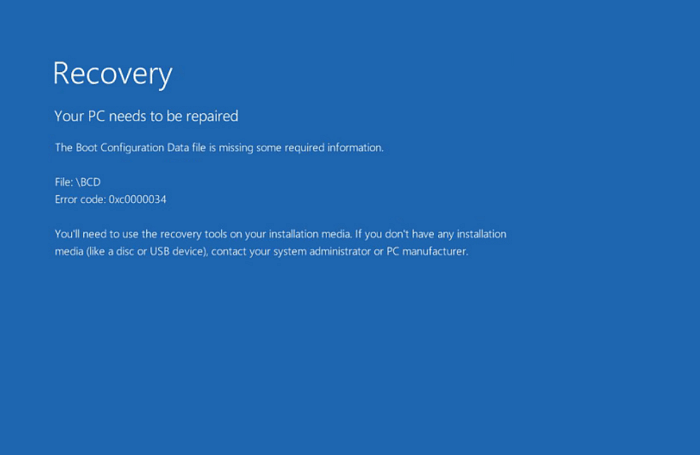
The "Unable to update boot configuration data" error indicates that Windows cannot modify or access the Boot Configuration Data (BCD) store. This store contains essential boot parameters. Corruption, missing files, or incorrect disk configurations are common causes.
Troubleshooting Steps
1. Use Windows Automatic Repair (Startup Repair)
This is the initial built-in tool to attempt to fix boot issues.
- Boot your computer from Windows installation media (USB or DVD).
- Select your language preferences, and click Next.
- Click on Repair your computer in the bottom-left corner.
- Choose Troubleshoot > Advanced options > Startup Repair (or Automatic Repair).
- Allow the process to complete and then restart your PC.
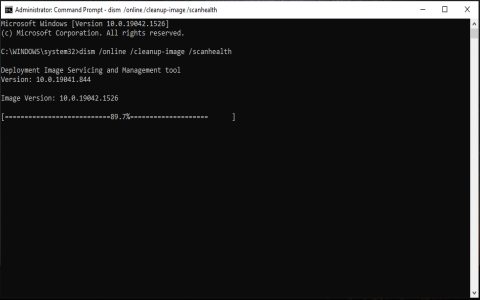
2. Rebuild the BCD using Command Prompt
If Startup Repair fails, manually rebuilding the BCD is often necessary. You will need to boot from Windows installation media.
- Boot from your Windows installation media as described above.
- Navigate to Troubleshoot > Advanced options > Command Prompt.
- In the Command Prompt, execute the following commands, pressing Enter after each:
bootrec /fixmbrbootrec /fixboot
-
If
bootrec /fixbootreturns an "Access is denied" error: This commonly occurs on UEFI systems. You'll need to prepare the EFI System Partition (ESP) and use thebcdbootcommand.- Still in Command Prompt, type
diskpartand press Enter. - Type
list diskand press Enter. Identify your system disk (e.g., Disk 0). - Type
select disk N(replace N with your system disk number) and press Enter. - Type
list partitionand press Enter. Identify the EFI System Partition (usually FAT32, around 100-500MB, often labeled 'System'). - Type
select partition M(replace M with the EFI partition number) and press Enter. - Type
assign letter=S:(or any other unique, unused drive letter) and press Enter. - Type
exitand press Enter to leave diskpart. - Now, execute the following command:
bcdboot C:Windows /s S: /f UEFI(Replace C:Windows if your operating system is installed on a different drive. Replace S: with the letter you assigned. Use/f ALLto target both UEFI and BIOS firmware types if unsure, or/f BIOSfor legacy systems). This command copies boot files from the Windows installation to the system partition and creates a new BCD store.
- Still in Command Prompt, type
- After successfully running
bootrec /fixbootor using thebcdbootcommand, continue with the following commands in the Command Prompt, pressing Enter after each:bootrec /scanosbootrec /rebuildbcd
- When prompted "Add installation to boot list?", type Y and press Enter.
- Close the Command Prompt, remove the installation media, and restart your computer.
3. Check Disk for Errors
File system errors on the storage drive can contribute to BCD issues.
- Open Command Prompt from the Windows Recovery Environment as previously described.
- Type
chkdsk C: /f /r /x(replace C: with the letter of your Windows installation drive if it's different) and press Enter. - The /f flag fixes errors on the disk. The /r flag locates bad sectors and recovers readable information. The /x flag forces the volume to dismount first if necessary. This process can take a significant amount of time.
- Once completed, restart your computer.
4. Run System File Checker (SFC)
Corrupted Windows system files can also impact booting.
- Open Command Prompt from the Windows Recovery Environment.
- Type
sfc /scannow /offbootdir=C: /offwindir=C:Windowsand press Enter. (Adjust drive letter C: if your Windows installation resides on a different partition, for example, D:Windows would use/offbootdir=D: /offwindir=D:Windows). - Wait for the scan to complete and then restart your PC.
5. Set Correct Active Partition (Legacy BIOS/MBR Systems Only)
This step is generally applicable only to older systems using Legacy BIOS and MBR partitioned disks. It is typically not needed for UEFI systems with GPT disks.
- Open Command Prompt from the Windows Recovery Environment.
- Type
diskpartand press Enter. - Type
list diskand press Enter. - Type
select disk N(where N is the disk number of your primary boot drive) and press Enter. - Type
list partitionand press Enter. - Type
select partition X(where X is the partition number of your system partition, typically the one containing Windows boot files, often labeled "Primary") and press Enter. - Type
activeand press Enter to mark the selected partition as active. - Type
exitand press Enter. - Restart your computer.
Important Considerations
- Data Backup: If accessible, attempt to back up crucial data before performing extensive troubleshooting, as data loss can occur, especially if hardware issues are present.
- Hardware Malfunction: While less common, a failing hard drive or faulty RAM can sometimes manifest as BCD errors. If software-based solutions repeatedly fail, consider hardware diagnostics.
- Firmware Type (UEFI vs. Legacy BIOS): Ensure the commands and steps you use are appropriate for your system's firmware. Applying MBR-specific commands (like setting an active partition extensively) to a GPT disk on a UEFI system, or vice-versa, can lead to further complications. The
bcdbootcommand with appropriate/fswitches (UEFI,BIOS, orALL) is generally robust in targeting the correct firmware type.