Mounting an external hard drive in Linux involves identifying the device, creating a mount point, and then using the mount command. Proper unmounting is also crucial to prevent data loss.
Step 1: Identify the External Hard Drive
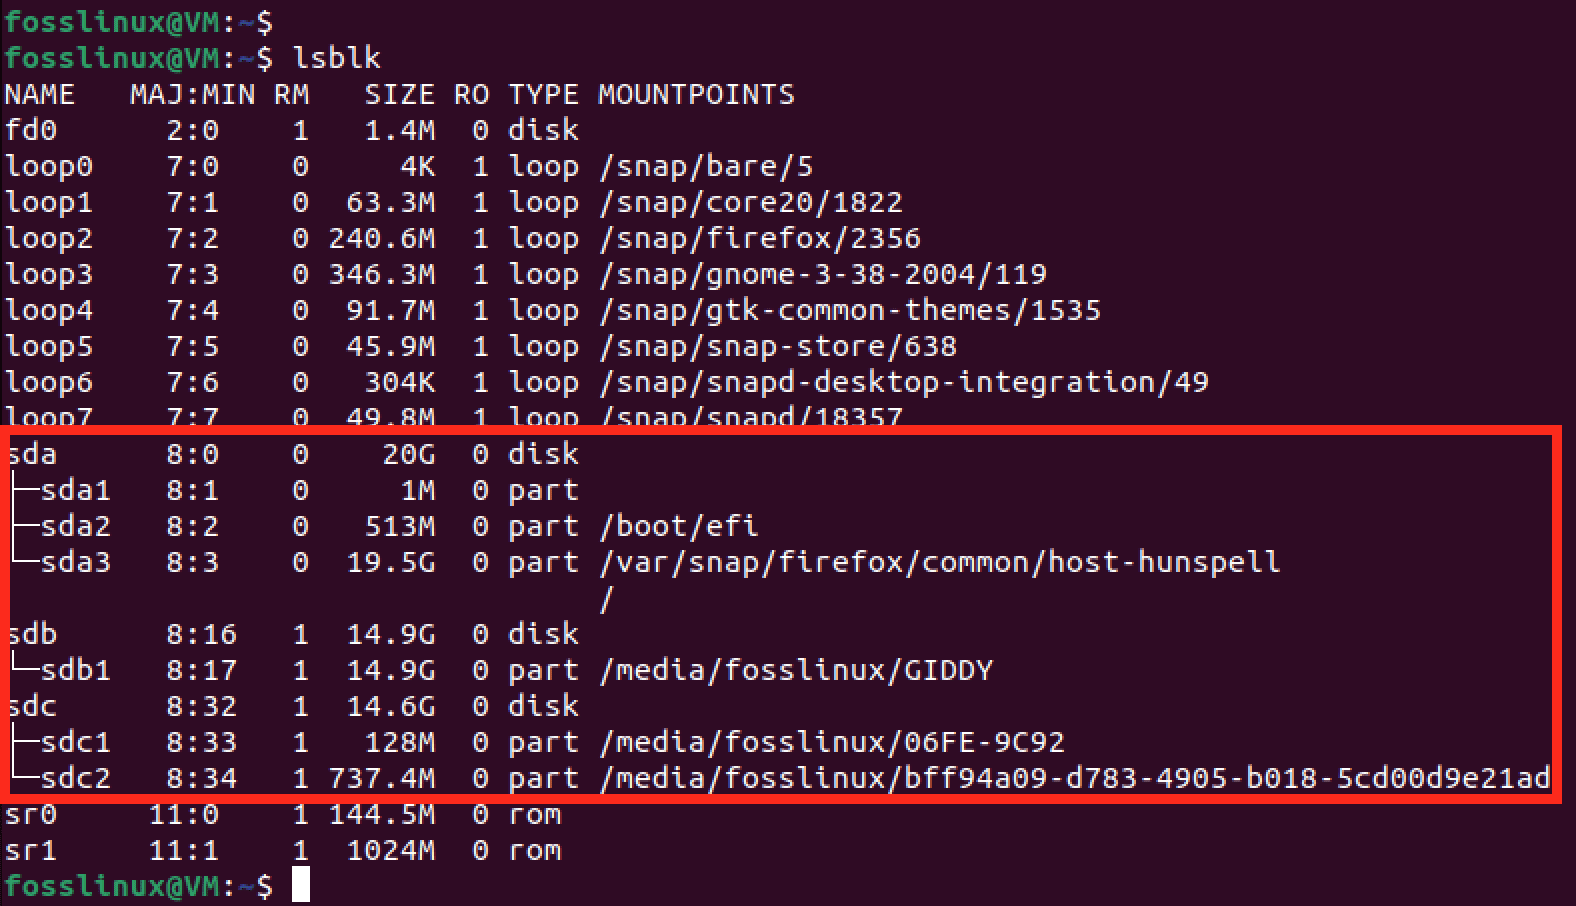
Connect your external hard drive. Open a terminal and use one of the following commands to list block devices and identify your external drive. It will typically appear as /dev/sdxN (e.g., /dev/sdb1, /dev/sdc1), where 'x' is a letter and 'N' is a partition number.
sudo fdisk -llsblk
Look for a device that matches the size of your external drive and isn't already mounted to a critical system path (like or /boot). Note the device name (e.g., /dev/sdb1).
Step 2: Create a Mount Point
A mount point is an existing directory where the filesystem of the external drive will be attached. If you don't have a preferred directory, create one. Common locations are within /mnt or /media.
sudo mkdir /mnt/myexternaldrive
Replace myexternaldrive with your preferred directory name.
Step 3: Mount the External Hard Drive
Use the mount command with the device name and the mount point you created.
sudo mount /dev/sdb1 /mnt/myexternaldrive
Replace /dev/sdb1 with your actual device name and /mnt/myexternaldrive with your actual mount point.
Specify Filesystem Type (if necessary):
Linux usually auto-detects the filesystem. If it fails, or you want to be explicit, use the -t option. Common types include:
- NTFS (Windows):
sudo mount -t ntfs-3g /dev/sdb1 /mnt/myexternaldrive(You may need to install thentfs-3gpackage:sudo apt install ntfs-3gon Debian/Ubuntu, orsudo dnf install ntfs-3gon Fedora). - exFAT (common for external drives):
sudo mount -t exfat /dev/sdb1 /mnt/myexternaldrive(You may need to installexfat-fuseandexfat-utils:sudo apt install exfat-fuse exfat-utilsorsudo dnf install exfat-utils fuse-exfat). - ext4 (Linux native):
sudo mount -t ext4 /dev/sdb1 /mnt/myexternaldrive - VFAT (FAT32):
sudo mount -t vfat /dev/sdb1 /mnt/myexternaldrive
Mount Options (Permissions & Ownership):
For filesystems like NTFS or exFAT that don't store Linux permissions natively, you might want to specify ownership and permissions at mount time using the -o option:
sudo mount -t ntfs-3g -o uid=$(id -u),gid=$(id -g),umask=0022 /dev/sdb1 /mnt/myexternaldrive
uid=$(id -u): Sets the owner to the current user.gid=$(id -g): Sets the group to the current user's primary group.umask=0022: Sets permissions (owner rwx, group rx, others rx). Adjust as needed. For more private access,umask=0077could be used (owner rwx, no access for group/others).
Step 4: Verify the Mount
After running the mount command, verify that the drive is mounted successfully:
df -hT: Shows mounted filesystems, their types, sizes, and where they are mounted.lsblk: Will show the device associated with your mount point.mount grep /dev/sdb1: Filters the output of themountcommand for your specific device.
You should now be able to access the files on your external drive by navigating to the mount point (e.g., cd /mnt/myexternaldrive and then ls).
Step 5: Unmount the External Hard Drive
Before physically disconnecting the drive, it is crucial to unmount it to ensure all data is written and to prevent filesystem corruption.
Ensure you are not currently inside the mount point directory in your terminal (e.g., cd ~ to go to your home directory).
sudo umount /mnt/myexternaldrive
Alternatively, you can unmount using the device name:
sudo umount /dev/sdb1
If the system reports "target is busy," it means a file or program is still using the drive. Close any applications accessing the drive and ensure your terminal's current directory is not on the mounted drive. You can use lsof /mnt/myexternaldrive to find out which processes are using the mount point.
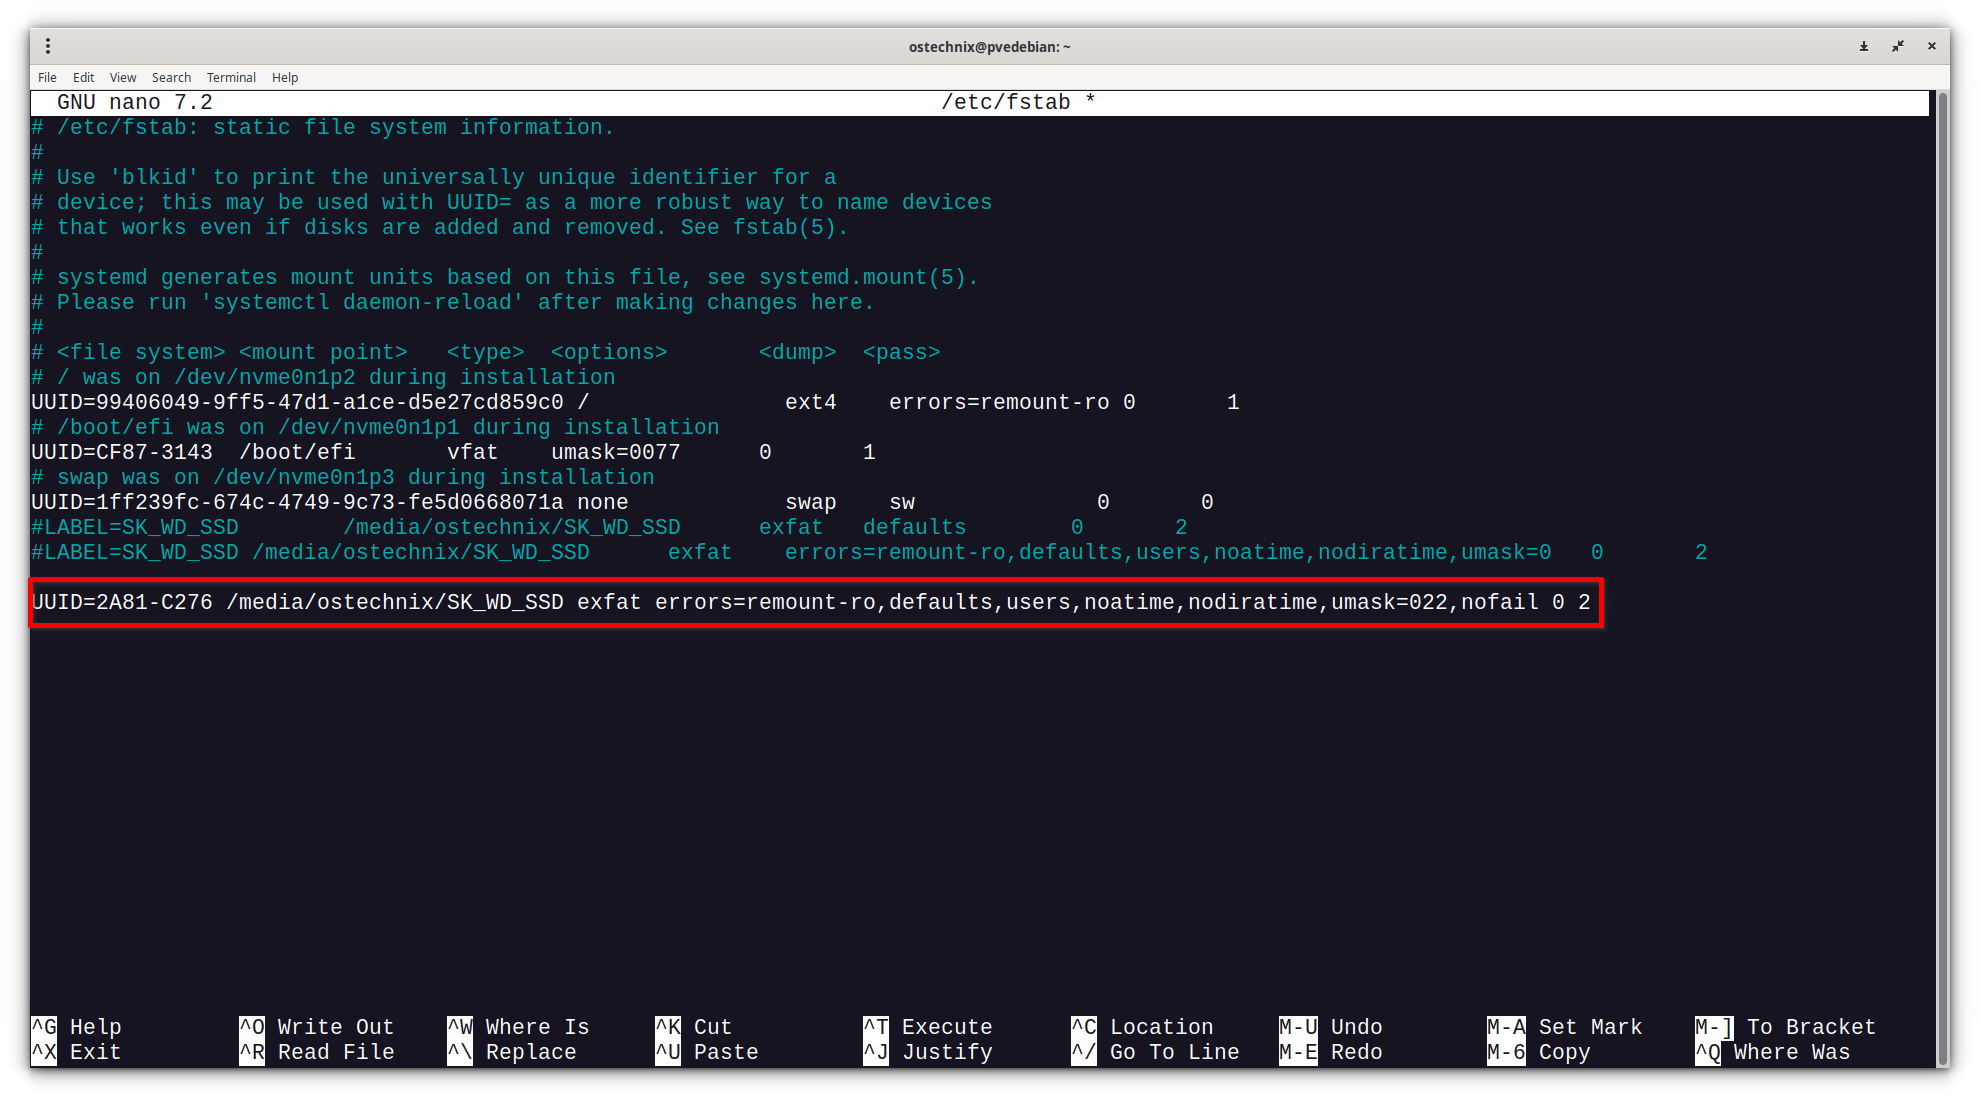
Optional: Automatic Mounting with /etc/fstab
For drives you connect regularly, you can configure them to mount automatically at boot by adding an entry to /etc/fstab.
1. Get the UUID of the partition:
sudo blkid /dev/sdb1
Note the UUID value (e.g., UUID="12345678-ABCD-1234-ABCD-1234567890AB").
2. Edit /etc/fstab:
sudo nano /etc/fstab (or your preferred text editor)

3. Add a new line at the end of the file. The format is:
<file system> <mount point> <type> <options> <dump> <pass>
Example for an NTFS drive:
UUID=YOUR_DEVICE_UUID /mnt/myexternaldrive ntfs-3g defaults,nofail,uid=1000,gid=1000,umask=0022 0 0
Example for an exFAT drive:

UUID=YOUR_DEVICE_UUID /mnt/myexternaldrive exfat defaults,nofail,uid=1000,gid=1000,dmask=022,fmask=133 0 0
- Replace
YOUR_DEVICE_UUIDwith the actual UUID. - Replace
/mnt/myexternaldrivewith your mount point. - Replace
ntfs-3gorexfatwith the correct filesystem type. defaults: Common default options.nofail: Prevents the system from halting boot if the drive is not present.uid=1000,gid=1000: Set appropriate user/group ID (find yours withid -uandid -g).umask,dmask,fmask: Control permissions.0 0: For dump and fsck pass number (usually 0 0 for external non-system drives).
4. Save the file and exit the editor.
5. Test the fstab entry (optional but recommended):
If the drive is currently mounted, unmount it first. Then run:
sudo mount -a
This command mounts all filesystems specified in /etc/fstab that are not already mounted. If there are no errors, your drive should now be mounted. It will also mount automatically on subsequent boots.