WireGuard on Arch Linux: A Concise Guide
Installation
- Install WireGuard:
pacman -S wireguard-tools
Configuration
- Generate Key Pairs:
- Private Key:
wg genkey tee privatekey wg pubkey > publickey
- Private Key:
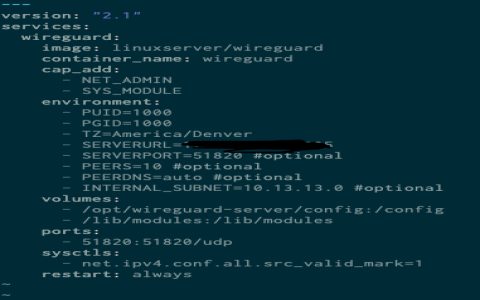
- Server Configuration (
/etc/wireguard/*):[Interface]Address = 10.6.0.1/24
ListenPort = 51820

PrivateKey = <Server Private Key>
PostUp = iptables -A FORWARD -i wg0 -j ACCEPT; iptables -t nat -A POSTROUTING -o eth0 -j MASQUERADE; ip link set dev %i up
PostDown = iptables -D FORWARD -i wg0 -j ACCEPT; iptables -t nat -D POSTROUTING -o eth0 -j MASQUERADE; ip link set dev %i down
[Peer]
PublicKey = <Client Public Key>
AllowedIPs = 10.6.0.2/32
- Client Configuration:
[Interface]PrivateKey = <Client Private Key>
Address = 10.6.0.2/32
DNS = 8.8.8.8
[Peer]
PublicKey = <Server Public Key>
Endpoint = <Server IP>:51820
AllowedIPs = 0.0.0.0/0
PersistentKeepalive = 25


Enable and Start WireGuard
systemctl enable wg-quick@wg0systemctl start wg-quick@wg0
Firewall
- Enable IP Forwarding:
**_forward=1in/etc/*and apply withsysctl -p - Configure iptables/nftables for forwarding and masquerading.
Troubleshooting
- Check logs with
journalctl -u wg-quick@wg0 - Verify interface status with
ip addr show wg0andwg show